Wick Hydroponic System: What Is It & How To Build A Wick System?
In our last articles, we shared how hydroponics systems help grow plants indoors throughout the year. However, this process might be challenging and expensive to begin. To deal with this problem, try the wick hydroponic system - a simple and affordable solution, especially for beginners. Let's dive in and discover how to use this system to create your stunning garden.
What Is The Hydroponic Wick System?
There are 6 main hydroponic systems for indoor plant cultivation without soil, and the wick system is the simplest among those. It is in the passive list, which means it works without complicated machinery or moving components like pumps and motors.
The wick system is quite basic and uncomplicated compared to active counterparts such as flood and drain systems. This setup makes the wick system suitable for beginners seeking a straightforward approach to hydroponics.
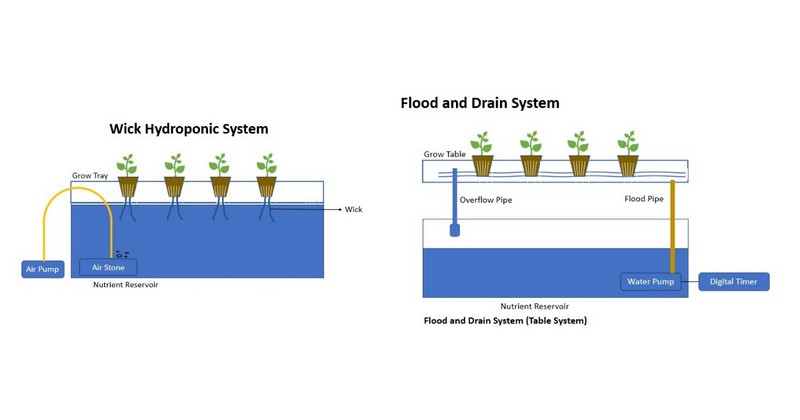
Wick system vs. Flood and drain system
Simple wick hydroponic systems are suitable for low-maintenance plants (herbs, rosemary, etc.), as well as leafy vegetables like lettuce. What these plants have in common is that they only need minimal amounts of water and nutrients to outlive.
Meanwhile, the more complex Wick Systems, like Autopot, are ideal for even larger pants (such as tomatoes) while still low-maintenance.
For the Autopot Wick System, the reservoir is placed above the pots. Gravity then will help the tubing reach the bottom of the pots, allowing the nutrient solution to flow. From there, the coco medium wicks the solution to the plant roots.
How Does A Wick System Work?
The wick system works on the principle of capillary action, a natural phenomenon where water moves through narrow areas against gravity.
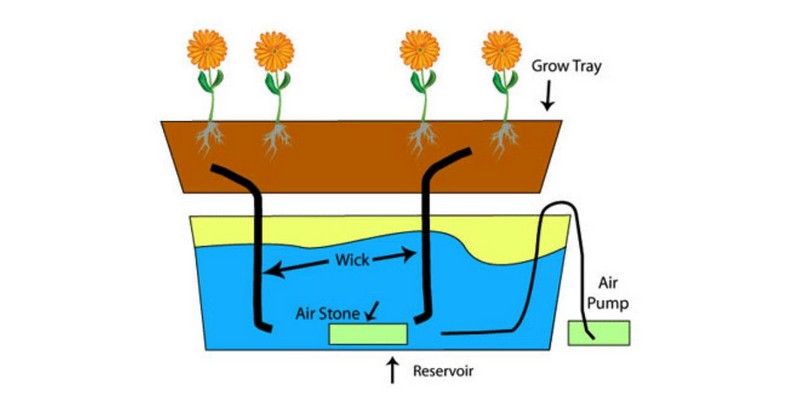
How a wick system works
Capillary action often occurs in our daily lives:
- When paper towels absorb water.
- Through the wicking process in fabrics that draw sweat away from our skin.
- Similar to how plants absorb water and nutrients from soil through their roots.
This action occurs because water molecules are naturally adhesive and stick to the walls of thin tubes or porous materials. This sticking creates a curved surface called a meniscus, and the water droplet is kept together by internal bonds known as surface tension. Water will move upward when the adhesive force between the water droplet and the capillary walls is more potent than surface tension.
The wick system hydroponics leverages capillary action to ferry water and nutrients from a reservoir to plants. Each plant is connected to the reservoir by at least one wick, typically two, for optimal efficiency. The reservoir should be beneath the growing surface or tray.
Through capillary action, water and dissolved nutrients go from the reservoir, up through the wicks, and into the growing medium where the plants are rooted. This simple yet effective mechanism is the core of a wicking hydroponic system.
How To Build A Wick System?
Excluding the plants, you only need 5 crucial components to build a hydroponic wick system:
- Container: A pot or tray to hold the plant and growing medium.
- Reservoir: Any bucket or container carrying enough water to sustain the plant.
- Hydroponic medium: Suitable medium like coco coir or rock wool to support the plant.
- Wicking material: Long strips of appropriate wicking material, such as string or rope.
- Nutrient solution: Any nutrient-rich solution to provide vital nutrients to the plant.
Get all these components at Benchmark Hydroponics at a reasonable price with a click. After preparing the needed materials, follow this detailed guide to assemble the system:
Step 1: Fill the Reservoir
Fill the reservoir with the nutrient solution mixture. To ensure proper dilution, carefully follow the instructions provided with your hydroponic nutrient solution. These instructions typically include the recommended ratio of solution to water for the ideal plant growth.
Consider using a measuring cup or scale to accurately measure the proper amount of nutrient solution according to the specified dilution ratio.
Step 2: Insert the Wicking Material
Cut several long strips of wicking material and aim for around 6-8 sections, each approximately 15-20 inches long.
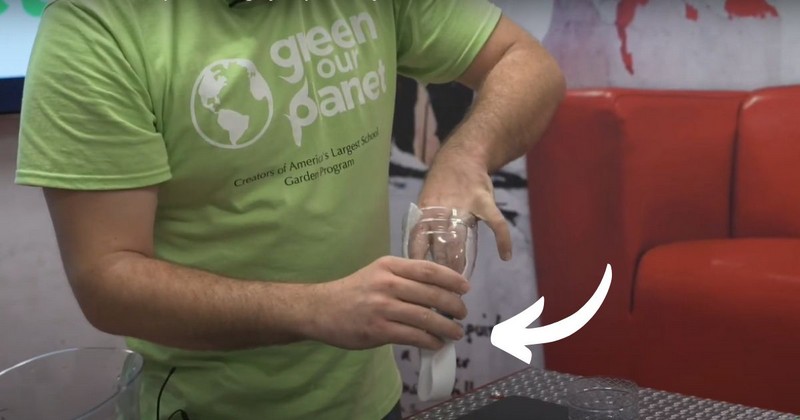
An example of DIY wicking material
Place one end of each wicking material strip into the growing medium. Because the absorbent material will draw liquid up to feed the plant's roots, you must ensure the liquid comes into contact with the nutrient solution in the container.
Step 3: Position the Plant
Your container or pot should accommodate the plant and the chosen growing medium. Then, place the pot containing the plant above the reservoir in a way that allows the wicks to hang down into the nutrient solution.
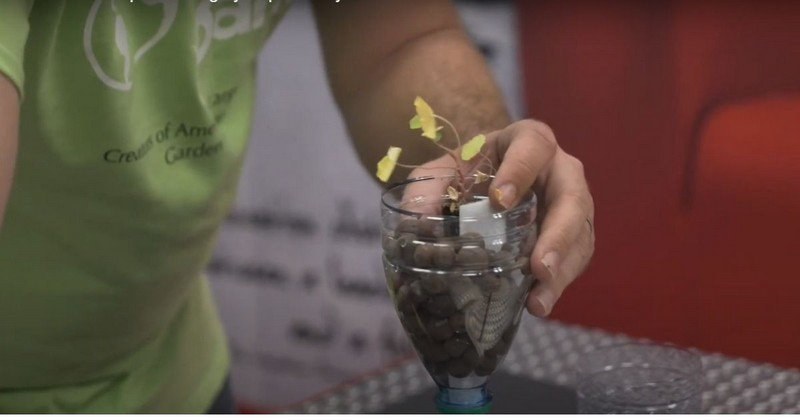
Position the plant properly
Remember, you must ensure the plant's roots are in direct contact with the wicking material to absorb nutrients better.
Step 4: Finish The Setup
Experiment with the wicks' length and the plant's positioning to find the optimal setup. The length of the wicks will decide how much nutrient solution is drawn up to the plant roots, so modify accordingly.
Once you position the plant, top up the reservoir with an additional nutrient solution. Finally, monitor the plant closely and adjust to ensure proper nutrient uptake and growth.
See more: Hydroponics vs aeroponics
4 Factors To Consider in Building A Wick Hydroponic System
When building a wick system, there are 4 factors to consider for optimal results:
Wicking Materials
You can repurpose many household items into effective wicks for your basic hydroponic system:
- Winter clothing fabric, known for its superior absorbent properties, can tear into long strips.
- Synthetic fibers, like nylon or polyethylene, work nicely as wicks because they have more durability than natural fibers.

An example of wicking materials
Remember, when choosing wicking materials, you need those with high absorption rates and resistance to rotting. Common household choices for wicks are nylon rope, wool rope or strips, braided PU yarn, propylene strips, mop head strings, etc.
To get the most effective wick for your system, conduct simple tests using coloured water to observe how far each fabric or material can transport liquid within an hour.
Besides, the number of wicks required per plant depends on the species and its hydration needs. Yet, using at least two wicks per plant is typically recommended for enough moisture.
Growing Medium
For some wick system hydroponics, water movement tends to be slow and less voluminous. Therefore, it's crucial to use a growing medium with high water absorption and retention abilities if you are using these simple systems. Otherwise, choose Autopot.
A great example of effective growing mediums is a 70/30 mix of Coco and Perlite, known for their impressive water retention properties. Further, other soilless mixes are suitable options due to their ability to retain moisture effectively.
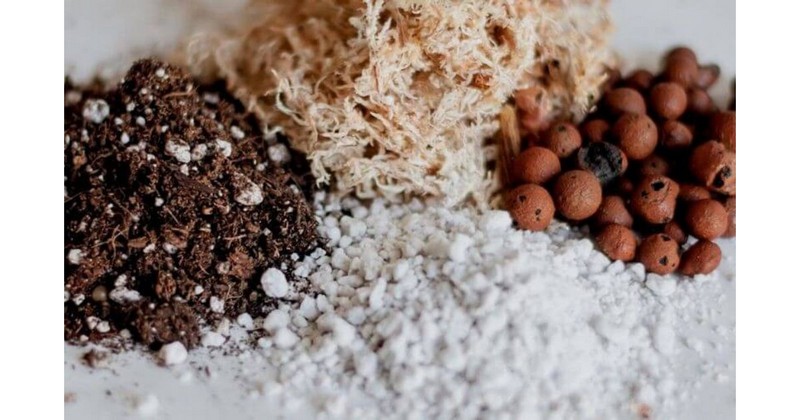
Which is the best growing medium?
Regardless of the medium chosen, it's critical to flush it with fresh water every few weeks periodically. This practice eliminates any accumulated excess nutrients, providing optimal plant growth conditions.
Reservoir
You must regularly refill the reservoir to maintain an efficient wick system. One more thing to remember: Since the system's effectiveness relies on the distance water travels up the wick, it's advisable to top up the reservoir regularly.
For more advanced wick systems, consider including an aeration system for sufficient water oxygenation. This approach is crucial as the plant roots are consistently in contact with moisture in a wick system. A simple option is to use a standard aquarium air stone and pump for aeration.
Moreover, you should regularly refresh the reservoir's water to keep the optimal nutrient balance. Also, if the reservoir is exposed to light, frequent water changes prevent algae growth and other unwanted organisms in the nutrient-rich solution.
Suitable Plants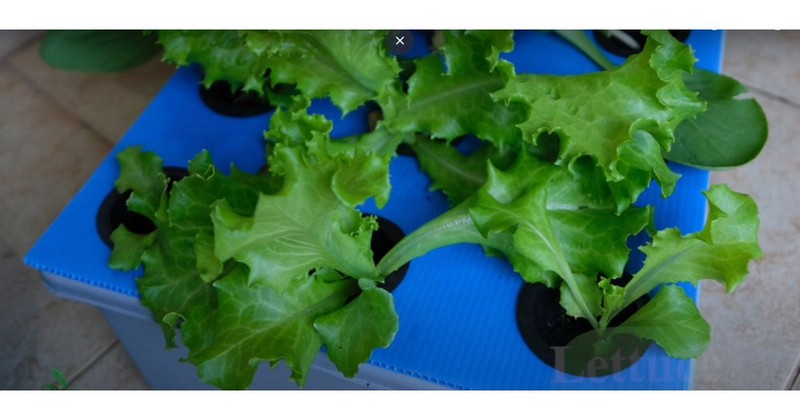
The plant options for simple wick hydroponic systems are relatively limited. We suggest using small herbs and non-fruiting vegetables.
The cotton-wick system's design is not for delivering large amounts of water and nutrients, which are critical for the growth of plants like tomatoes. Therefore, such water and nutrient-demanding plants may have difficulty growing in a cotton-wick system.
However, plants with lower nutrient and water needs, such as lettuce, can thrive in these conditions. On the contrary, large plants may struggle to get enough nourishment and could eventually. Therefore, you must consider the needs of your plants and choose accordingly.
If you prefer more hydroponic plant options in your garden, you need Autopot. It allows you to grow various crops, including carrot, galangal, strawberry, sweet potato, potato, corn, grape, guava, and more.
See more: NFT hydroponics
Advantages and Disadvantages of Wick Systems
Here is a summary table of the pros and cons of the Autopot:
|
Advantages |
Disadvantages |
|
|
Frequently Asked Questions
Can you overwater with wick watering?
No, you typically cannot overwater with wick watering. The wick only provides water to the plant when needed; hence, you can avoid the risk of over-watering.
What is the difference between a wick system and a deep water culture (DWC)?
The biggest difference between these two systems is how they transport water and nutrients to plants:
- Wick system: The plant gets water and nutrients through a wick connected to a reservoir.
- DWC: Plant roots are dipped directly into a nutrient-rich water tank.
Besides, DWC demands oxygenation to prevent root rot. Meanwhile, hydroponic wick systems do not need external support like that to work correctly.
The Bottom Line
A wick hydroponic system is an excellent starting point you can try while learning the basics of soilless gardening. While it may have limitations, understanding the wick system is a solid foundation for you to try more advanced hydroponic techniques in the future. So, if you are ready to start, let's begin your soilless gardening journey today!
