How To Propagate Orchids In 3 Methods: Ultimate Guide From Experts
How To Propagate Orchids In 3 Methods: Ultimate Guide From Experts
Orchids are the home favorable plant for their beautiful blossoms and distinctive growth habits. Whether you love Cattleya, Vandas, or Cymbidium orchid, you can spread more of this plant by following this expert guide to explore how to propagate orchids.
What Is The Best Time To Propagate Orchids?
Spring and early summer (from March to May) are the best time to propagate orchids as they finish flowering. At this time, the weather is also warmer and humid, creating favorable conditions for new orchid plants to grow successfully.
Additionally, it's best to propagate orchids before repotting. This timing allows the new plant to adjust to its new environment without being disturbed too much.
*Note: The time to propagate orchids also depends on their species and your local climate. It is better to know your plants' needs to decide on a suitable time to propagate them.
How To Propagate Orchids With 3 Basic Methods
There are three common ways to propagate orchids: Division, Keikis, and Back Bulbs. The method you apply will depend on the type of orchids.
Now, let's learn how to propagate orchids in 3 different methods.
Method 1: Propagate From Keikis
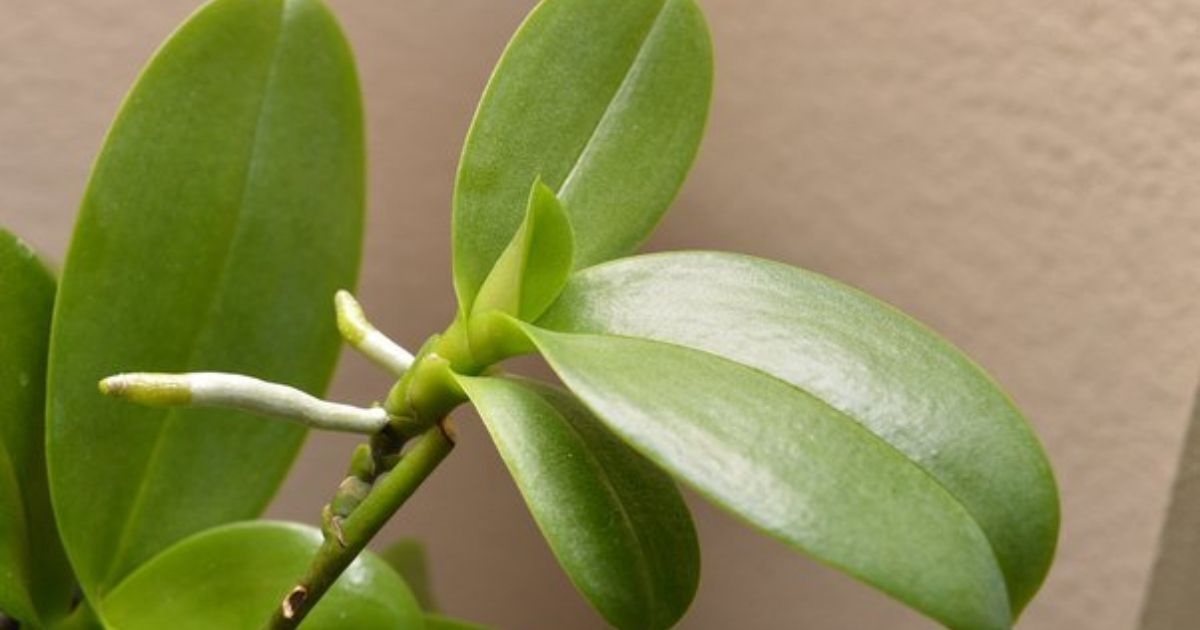
Keikis are baby orchids. Propagation from Keikis is the method that usually grows baby orchids from Vanda and Dendrobium orchids. Planting new orchid plants from Keikis will take about 1-3 years to bloom.
Before propagating, look for Keikis on the main stem. They resemble new flower spikes. Instead of flowering, they develop new leaves and roots in about 6 to 8 months.
- Carefully use a clean, sharp knife to cut the Keiki from the main stem when you see new roots growing.
- Cut the main stem above where the keiki joins and below its longest root(It's better to wait until the baby orchid has 3 to 4 roots before removing it so that it can grow well).
- Put the Keiki in a small pot with orchid soil.
- Keep the soil well-draining (warmth, humidity, and indirect sunlight are best for its growth).
*Note: Remember to treat the cut surface of Keiki and the main plant with a fungicide to do fungus treatment.
Method 2: Propagating By Division
The division is also a simple orchid propagation method that involves dividing an orchid into pieces. This method increases the chance of growing success. However, it can take several years for an orchid to mature enough to bloom.
- Gently remove the orchid from its pot without harming the roots.
- Hold the bottom of the plant and flip the pot over to gently shake out any loose soil (this action will loosen the roots and let you lift the orchid out of the pot).
- Look for older roots that have grouped or formed a ball-like structure ( note: the youngest roots usually grow near the top of the stem).
- Cut the root ball away from the main stem with a clean, sharp tool. Brush off any leftover soil. Then, trim any small roots from the top of the clumped structure.
- Put the roots in a pot, with the long ones pointing down. Fill the pot with orchid potting mix and keep the top part of the root ball above the soil.
- Place the pot on a tray with damp pebbles and keep it in a spot with indirect sunlight.
- Remember to take care of new growth and ensure the pot stays wet but not soggy. Once the orchid grows well, you can do a regular care routine.
Method 3: Propagating From Back Bulbs
The back bulb is an older, less active bulb at the bottom of the plant. It's like a storage unit for the orchid, holding nutrients and water for when the plant needs them.
Orchid propagation from back bulbs can take several years to produce new growth. But as long as the back bulb stays green, new leaves can grow and give you a beautiful new plant.
- Look for back bulbs on the outer edges of the pot (they might look dry and papery, but still green and have one or two small bumps).
- Make a V-shaped notch in the stem that connects to the back bulb with a clean, small knife or razor blade.
- Let the plant stay in its pot without moving it until you see the dormant bud start to grow into new leaves.
- Cut it away from the main plant with a clean knife once you see new growth on the back bulb.
- Put the back bulb in a small pot and spray daily to keep it moist, but wait to water or add fertilizer until it grows roots.
- Start watering and fertilizing regularly once it has roots.
Tips: It's better to put the back bulb on a damp sphagnum moss layer at the pot's bottom. Keep the pot in a warm, humid spot with indirect sunlight, and spray the bulb and moss to keep them moist.
Conclusion
Growing orchids might be difficult at first compared to other easy-to-grow plants. However, with our ultimate guide on how to propagate orchids offering three accessible methods, it’s no longer an issue. The Division, Keikis, or Back Bulbs propagating method is also worth trying to make stunning plants in your home.
Frequently Asked Questions
1. Can You Grow An Orchid From A Cutting?
Yes, you can make new orchids from cuttings. Cut a healthy stem with at least two nodes and put it in a good rooting mix. With the proper care, it'll grow roots and become a new orchid plant.
2. Can You Propagate An Orchid In Water?
It depends on the orchid species, as each will adapt to different environments and climates.
For example, Dendrobium and Vanda are two types of orchids that can propagate in water by growing roots and cutting. In contrast, terrestrial orchids can not propagate by this method as they can quickly rot in water.
3. Can You Grow An Orchid From A Broken Stem?
If it is a broken Phalaenopsis or Vanda orchid stem, you can grow it by cutting it, which can help you make a new orchid stem.
The broken stem could become a new healthy orchid in the next few days with proper care, such as light without direct sunlight, not too much water, and raising enough humanity.
