Australia-Wide Delivery
Discreet Shipping
High Quality Products
Buy now pay later
Customer Support
Do you want to grow your herbs and vegetables without soil? Look no further than a hydroponic garden! Hydroponics offers an innovative approach to sustainable agriculture, enabling the cultivating of various plants in controlled environments.
However, how to make a hydroponic garden is a confusing problem for many growers. Let Benchmark Hydroponics help you make a DIY hydroponic garden within 12 simple steps. Scroll down for more!
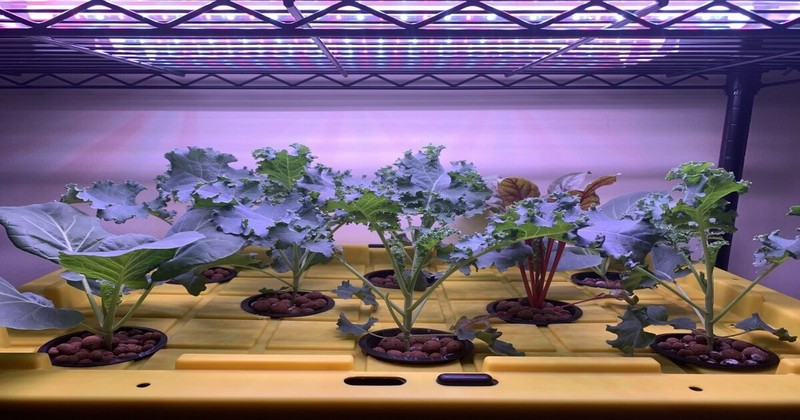
Image via Dengarden
Among many types of hydroponic systems, Deep Water Culture (DWC) is one of the easiest to build at home. According to Virginia State University, the plants will grow healthier with their roots submerged directly in nutrient-rich water. Home growers can grow vegetables in sizeable opaque storage containers or buckets.
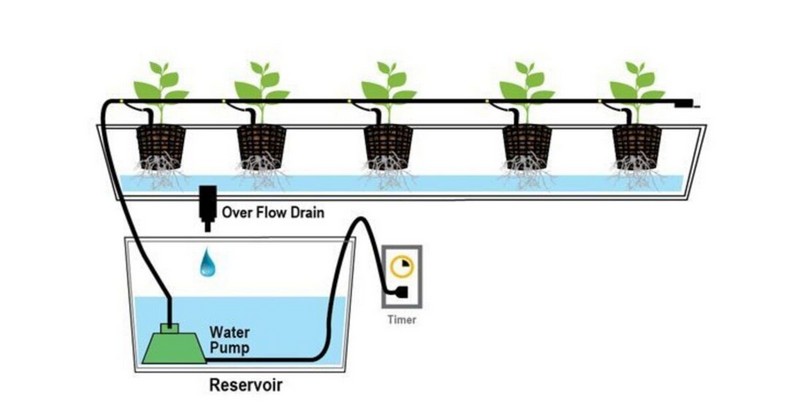
Image via Epic Gardening
Moreover, commercial growers use rafts that float on a large water bed. They work like a conveyor belt with young plants added on one side. Then, they will move along until they are ready for harvest.
The lack of moving parts makes building DWC systems relatively simple and cheap. The water in these systems does not recirculate. Therefore, it remains sitting in the reservoir for the entire plant's life. It means you must aerate the water to refill the roots' oxygen.
However, the water level will reduce over time as the plant drinks it. Sometimes growers will change the water out to keep their plants fresh. So, keep in mind that:
Understanding hydroponic systems is a really basic step before learning how to make a hydroponic garden. The step-by-step instructions below will help you master this DIY garden.
Deeper storage containers and buckets work best for these systems. This is because the more water you have in your reservoir, the more stable your nutrient solution will be. Smaller ones are more prone to fluctuations in PH levels and nutrient concentration, so you must top up the water more frequently.
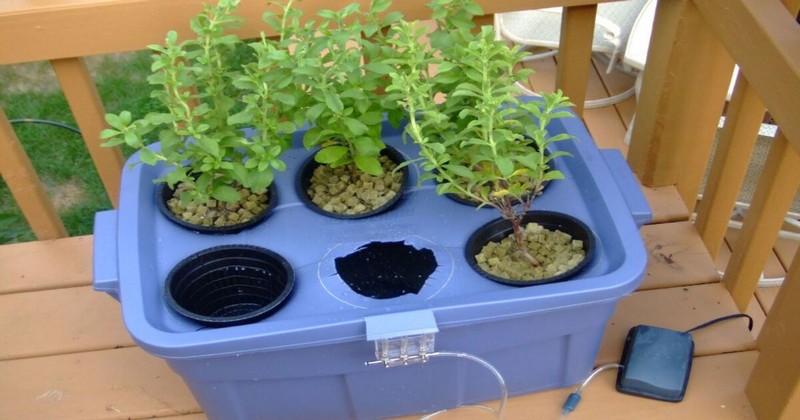
Image via Dengarden
To prevent algae from growing in your water, ensure light can't penetrate your container. You can use a 55-l opaque storage container from a previous project. However, in this case, it is most preferred to use a deeper container.
You will need net pots before growing plants in a container. These pots have many holes for roots to grow through. Next, you need to drill holes into the container lid. This is where the net pots will be placed.
Start with a hole saw, a specialist tool that is affordable and easy to use. Ensure the net pots you use are larger than the holes to prevent them from falling through.
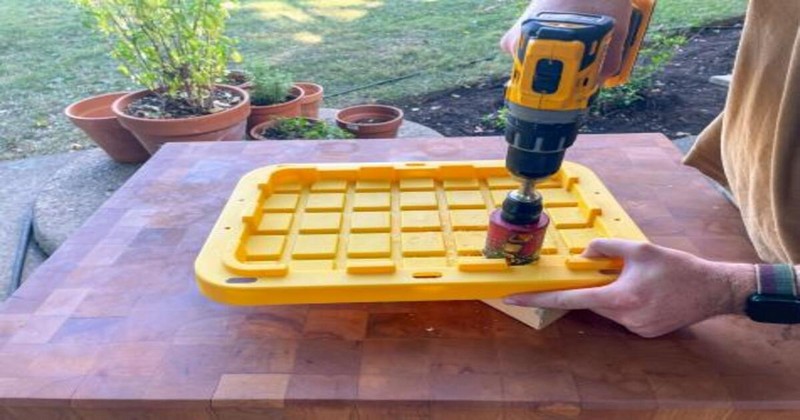
Image via HGTV
If you have a wider container, you can drill multiple holes. Let's keep the holes 15cm apart to accommodate the size of mature plants. If you're using a 20-lb bucket, we advise drilling one hole in the center to create a single plant system. This is great for growing larger plants such as tomatoes or courgettes.
And don’t forget to add drainage holes to the bottom of the pot. Drainage holes allow excess water to 'drain' out, thus helping to prevent the potting media from becoming soggy and causing root rot.
If the grower makes a mistake and needs to change out the water, he'll need to open the drainage hole and let the water drain out.
Make sure to place the air pump outside of the reservoir. The air pump will come with a check valve, which will prevent water from being sucked back up when it is turned off. If the check valve is not included, position the pump above the water level.
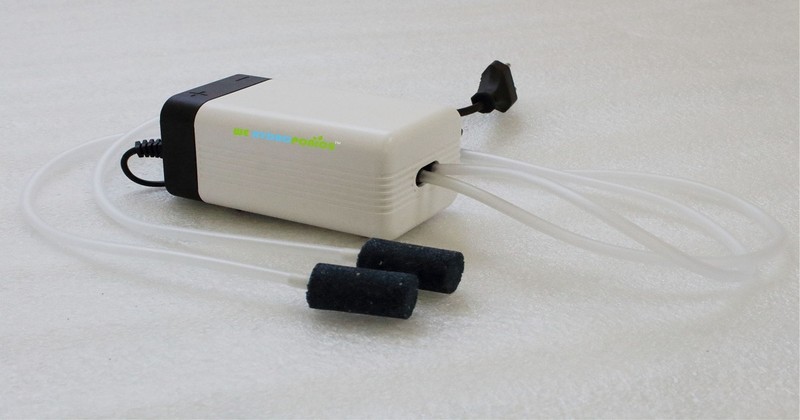
Image via WE Hydroponics
Next, use a length of tubing to connect the air stone and check valve, and make sure that the arrow on the check valve is opposite the air stone. Finally, the check valve is attached similarly to the air pump.
Choose a spot for your container before filling it up, as it can become quite heavy when full. Fill it up almost completely with water, leaving only a little space at the top, around 1-2cm.

Image via Spurce
Afterward, add hydroponic nutrients to the water. You can follow the instructions on the bottle to know how much to add. For instance, 2ml of each A and B nutrient per liter. Using a measuring cup, you can add 110ml of each nutrient into your 55-liter container.
In addition to the nutrients, it's important to adjust the pH of the water. To do this, use a pH meter to check the acidity level. Typically, tap water will have a pH ranging from 6.5 to 7.5. However, most vegetables and herbs require slightly acidic nutrient solutions.
Image via Adobe Stock
To lower the pH level to 5.5-6.5, add drops of phosphoric acid using a pipette. You can purchase this acid commercially as "pH Down" for hydroponics. Wear gloves when handling the pH Down and mix the solution well after applying it.
First, plug in the air pump and position the air stone in the reservoir. Once done, secure the lid tightly on top, and you'll be almost there.
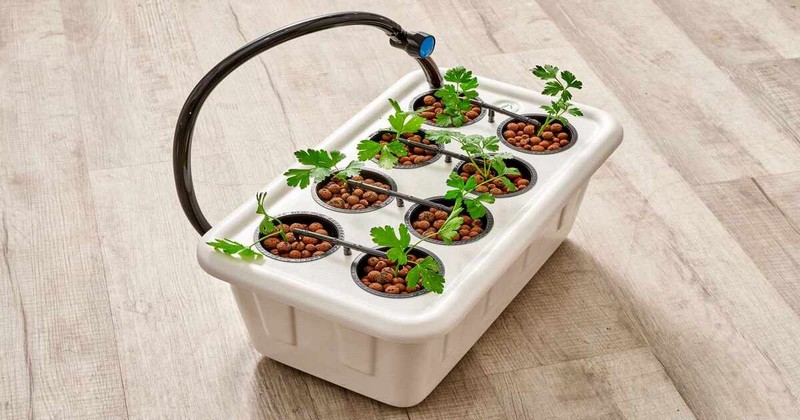
Image via The Spurce
Now, add your plant. You can use rock wool plugs to grow your plants, which are easily placed into net pots. Alternatively, you can use seedlings grown in soil. However, it can create a bit of a mess, hence, we suggest using cleaner options like hydroton clay pellets or rock wool plugs to avoid this.
Growing hydroponic plants is tricky for beginners as there are many steps to remember. But don’t worry. We’re here to help you optimize your hydroponic gardening with 3 insightful tips below.
Water quality in hydroponics impacts your plants' overall health and growth. Because you don’t have soil to buffer the water, you must use pure and balanced water to ensure optimal growth. If you use your water source, consider obtaining a laboratory analysis to determine its composition.
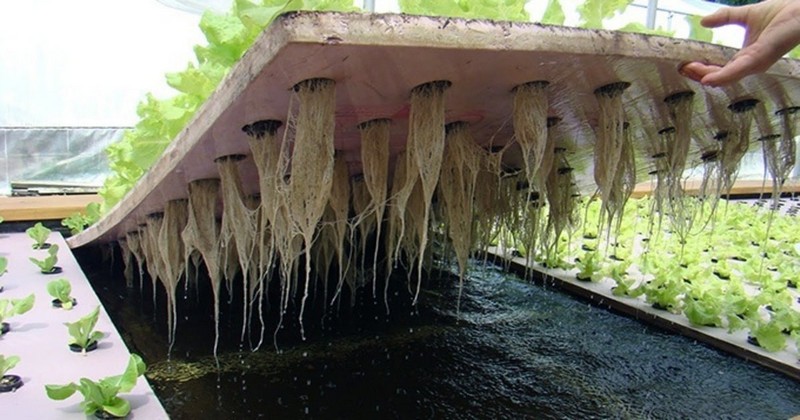
Image via Epic Gardening
Municipal water often contains calcium, magnesium bicarbonates, chloride, and sulfates. These chemicals can affect your hydroponic system's pH and nutrient levels. Understanding the composition of your water will help you manage and treat it effectively.
See more: carbon filters hydroponics
To maintain an adequate nutrient balance, you should follow the recommended dosage by the nutrient manufacturer. Overdosing can result in an imbalance that can negatively impact plant growth. However, adding nutrients in enough doses allows them to mix thoroughly into the reservoir before adding more.
Below are 16 essential nutrients in hydroponics that you must know:
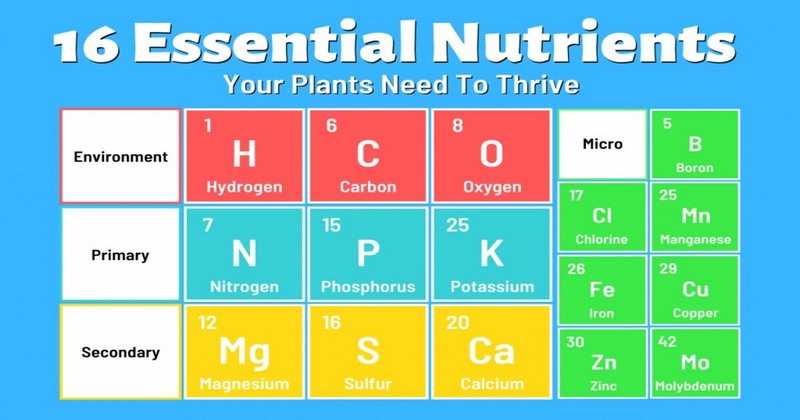
Image via Farmshares
This is essential to prevent vital elements from settling out of the solution and becoming unavailable to the plants. Combining different nutrient manufacturers requires careful calculation of the doses to avoid overfeeding or underfeeding the plants.
Maintaining the pH levels in a hydroponic system is crucial for the plants' proper nutrient uptake and overall health. Unlike soil-based gardening, where the soil is a natural buffer, hydroponic systems need regular monitoring and pH level adjustment.
You can see the pH chart for the hydroponics system below:
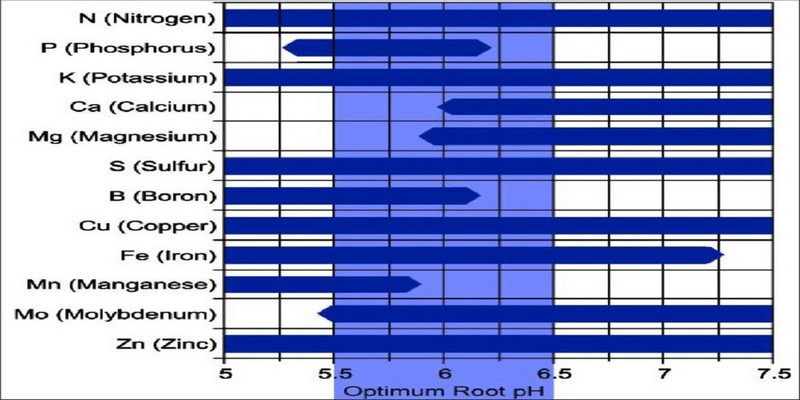
Image via Researchgate
A suitable pH range for most hydroponic plants is between 5.8 and 6.2, which is slightly acidic. Gradually lower the pH level using a weaker acid to avoid overshooting the target. If you only have stronger acid, dilute it before use to adjust the pH effectively.
Tip 4: Choosing the Right Hydroponic System
When setting up your hydroponic garden, you must choose the right system that suits your needs and resources. Here are some suitable hydroponic systems for beginners:
|
Hydroponic System |
Description |
|
Wick System |
|
|
Nutrient Film Technique (NFT) |
|
|
Ebb and Flow System |
|
Congratulations! You now know how to make a hydroponic garden. Remember to choose the right system for your needs, provide balanced nutrients, and monitor environmental conditions. Besides, maintaining regular care is also essential.
With hydroponics, you can enjoy fresh vegetables all year round, even in limited space. Don't forget to visit Benchmark Hydroponics to view more great tools for your gardening journey.