How To Propagate Rubber Plan With 6 Easy Steps
Key Takeaways
- A rubber plant belonging to the Ficus genus is a popular houseplant known for its glossy, dark green leaves and robust growth.
- To propagate rubber plants successfully, you must cut a healthy stem with a few leaves, dip the cut end in the rooting hormone, and grow the cutting in soil with proper aftercare.
- There are two ways of propagating rubber plants: Cuttings or air layering. Cuttings are a very simple and easy-to-use method. Air layering requires more time.
What Is Rubber Plant?
The term "rubber plant" typically refers to Ficus elastica, a popular houseplant known for its glossy, sturdy leaves. This plant is part of the fig genus and is native to Southeast and South Asia's eastern parts.
According to the NASA Clean Air Study, the Rubber plant (a member of the Ficus genus) also purifies indoor air efficiently. Moreover, they can grow quite large if given enough space and proper care, which includes ample but indirect light and moderate watering.
See more: How To Propagate Fig Tree: A Comprehensive Guide By Experts
How To Propagate Rubber Plants From Cutting In 6 Easy Steps
If you don’t want to take a cutting from an unhealthy or unsuitable part of the plant, you must follow 6 steps below:
Step 1: Have A Clean Surface Area
Without a clean surface area, your cutting may catch fungal infections that could compromise your plants' health. Below are steps to ensure you have a clean surface before you start:
- Opt for a non-porous, easily cleanable surface like a glass, plastic, or metal table. Avoid using porous surfaces like wood, which can harbor bacteria and fungi.
- Start by clearing the surface of any organic material, dirt, or debris. Use a brush or a cloth to sweep away loose particles.
- Wash the surface with warm water and mild detergent. This step helps to remove any grease, dust, or residual dirt. Use a clean sponge or a cloth for this purpose.
- After cleaning, disinfect the surface to kill any remaining bacteria, viruses, or fungi. You can use a variety of disinfectants:
- Isopropyl Alcohol: Use a spray bottle to apply 70% isopropyl alcohol. Wait 30 seconds before wiping it off with a clean cloth.
- Bleach Solution: Mix about 1 tablespoon of bleach with 1 gallon of water. Apply this solution to the surface and allow it to sit for at least 5 minutes before rinsing with clean water and drying.
- Commercial Disinfectants: Follow the instructions on a commercial disinfectant product, ensuring it's suitable for the type of surface you're cleaning.
5. After disinfecting, rinse the surface with clean water to eliminate the remaining residue from the cleaning agents. Then, dry the surface thoroughly with a clean cloth or let it air dry.
See more: How To Propagate Plants In Water: The Ultimate Guide 2024
Step 2: Identify Where To Plant
The next step in the series on how to propagate rubber plants is to identify where to grow your rubber plants.
Rubber plants require indirect sunlight. North—or east-facing windows typically offer the best light conditions for your plants.
Moreover, these plants prefer warm environments, ideally between 60-75°F (15 and 24°C). Avoid placing your plant near drafts, air conditioning units, or heat sources like radiators, which can cause temperature fluctuations.
Regarding humidity, rubber plants do well in moderate to high humidity. If your home is dry, especially in winter, consider using a humidifier or placing a humidity tray near the plant.
Bathrooms with sufficient light or kitchens can also be good spots due to their higher humidity.
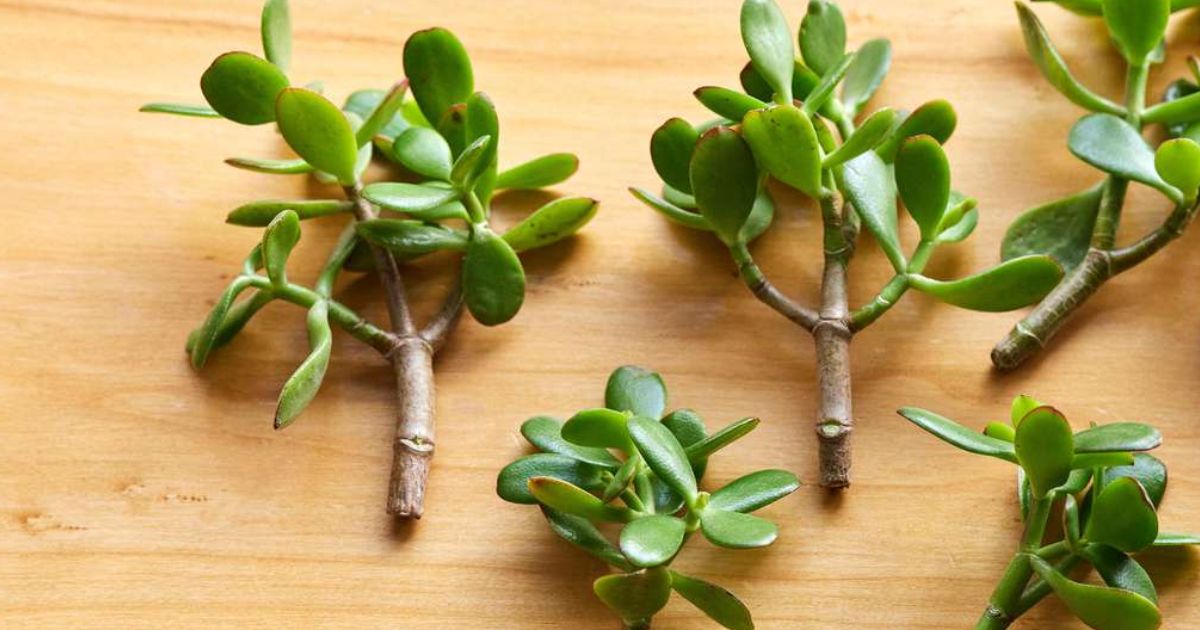
Step 3: Take The Cuttings
- Choose a healthy branch from the rubber plant that has several leaves and appears disease-free. It should be about 6 inches long. Avoid branches that are too young (green and flexible) or too old (thick and woody).
- Use a knife or a clean, sharp pair of pruning shears. To prevent disease from spreading, rub alcohol or use a bleach solution to sterilize your cutting tool.
- Identify a point on the branch just below a leaf node (where a leaf joins the stem), the roots will sprout from here.
- Make a clean, angled cut about a quarter-inch below the node. The angle increases the surface area from which roots can grow and helps the cutting absorb more water initially.
See more: How To Propagate Pine Trees: Step-By-Step Guide for Starters
Step 4: Prepare The Cuttings
- Remove the lower leaves near the cut, prevent them from rotting when planted, and focus the plant's energy on root development. Leave about two to three leaves at the top of the cutting.
- If the remaining leaves are very large, you can cut them in half horizontally to reduce moisture loss and save space.
- Immerse the cut end of the stem into rooting hormone powder or gel, contributing to root development.
- Shake off any excess hormone to prevent the cutting from being overwhelming. The hormone stimulates root growth from the node.
- Let the cutting air dry for a few hours or even overnight, allow a callus to form over the cut area, and reduce the risk of rot and infection once the cutting is placed in soil or water.
Step 5: Grow The Cutting In Soil
- Use a well-draining potting mix suitable for rubber plants. A blend of peat, perlite, and pine bark often works well, retaining moisture and drainage.
- To prevent waterlogging, choose a drainage hole pot. The pot should be appropriately sized for the cutting—typically, a small pot, about 4-6 inches in diameter, is sufficient to start.
- Fill the pot with the water and potting mix lightly to settle the soil.
- With a stick or your finger, make a hole in the center of the soil deep enough to accommodate the stem and at least one node.
- Place the cutting in the hole, ensuring that the node (or nodes) where roots are expected to form is buried beneath the soil surface.
- Gently press the soil around to firm the cutting in place, ensuring it stands upright and is well-supported.
- After planting, water the soil thoroughly until water runs out of the drainage holes. This initial watering helps settle any air pockets around the cutting.
- Then, keep the soil consistently moist but not soggy. Water when the top inch of soil is dry. However, overwatering can cause root rot, so ensure good drainage.
See more: How To Take Plant Cuttings With 9 Basic Steps (Expert Guide)
Step 6: Take Care Of Propagated Rubber Plant
- Now you know how to propagate rubber plants properly. However, aftercare is also essential to maintain thriving plants. Here are some tips to apply:
- Put the pot in an area that receives bright, indirect sunlight.
- Maintain a consistent temperature between 60-75°F (15 and 24°C), and avoid placing the plant near drafts or heat sources.
- You can increase humidity by putting a humidity tray beneath the pot, misting the leaves regularly, or using a humidifier.
- Once your rubber plant shows new growth, you can start fertilizing. Use a balanced, water-soluble fertilizer every 4-6 weeks during the growing season (spring and summer), diluted to half the recommended strength.
Frequently Asked Questions
1. Can You Grow A Rubber Plant From A Cutting?
Yes. There are two rubber plant propagation methods you can choose from. You can take cuttings from the main stem, or if your plant is already larger, you can opt for propagation from node cuttings. For both methods, using a clean and sharp knife is best.
2. Can You Propagate A Rubber Plant In Water?
Yes, you can propagate rubber plants in water. Simply place the stem cutting with at least one node submerged in a water container, ensuring no leaves are underwater to avoid rot. Change the water weekly and keep the container in a spot with bright, indirect light until roots develop, then transplant into soil.
3. Where Do You Cut The Rubber Plant?
Take cuttings at a 45-degree angle just above the nodes—those little bumps where branches and leaves intersect. This encourages the Rubber Plant to sprout new growth, keeping it lush and lively.